Search the Community
Showing results for tags 'engine'.
-
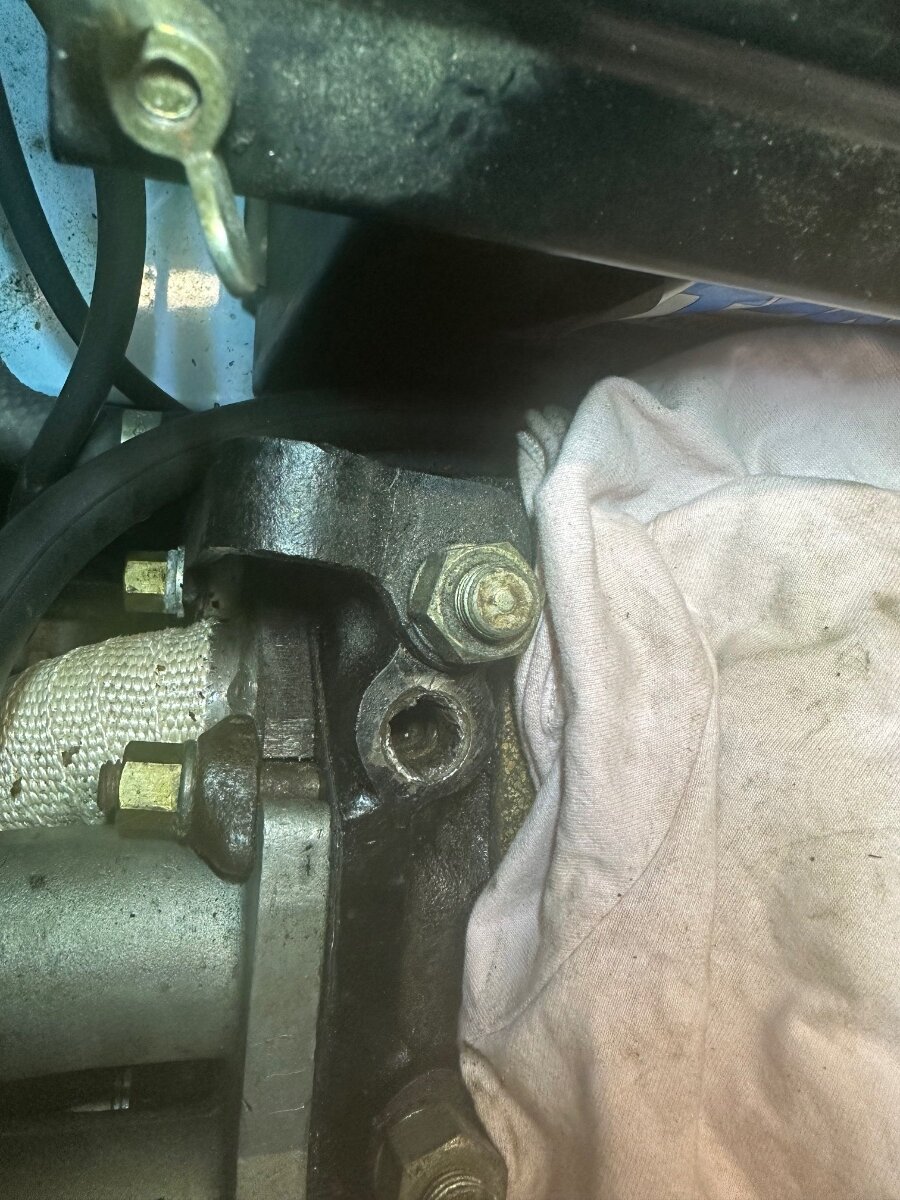
Hi All, I’m tuning to you all for some help I needed to swap out the heater valve and the pipe that connects it to the cylinder head due to a small pin hole leak. As I suspected, the pipe adapter snapped off but the thread seems to be properly bonded to the cylinder head. I’ve tried using a nipple extractor with little success; it just chewed up some of the soft metal but didn’t get the thread to release. Mind you, I have only used the nipple extractor using a spanner and didn’t dare use a drill or apply lots of torque. What are my next best steps? Use lots of strength and just keep trying to extract the thread or is it time to remove the cylinder head and find a metal working shop? Any other suggestions for me to try? Picture attached. I guess these things are sent to test us As always, thanks in advance for your help, Adam

-
Hi, advise required please I would like to fit the engine with the clutch fitted to the engine stand. Is this possible, Thought I would ask before I spend a couple days trying to do this Also is it save to load the engine on the stand with 4 bolts conected to the gear box mount Thank you pink
-
My Tr6 CR rocker assembly is showing signs of considerable wear. I have obtained another assembly which seems good. However the rockers do not have the lubrication holes on the top. Apparently this may indicate that they came from a saloon. Were these used on early TR 5s as well? My main question is are these OK to use on my TR6? MARK
-
I have done a lot of work on my 73 CR TR6 recently and turning attention to the engine. I am swapping cylinder head and camshaft. I currently have the sump off and have been contemplating fitting a new oil pump. I have heard some horror stories re the quality of replacement oil pumps. TRGB have assured me that they have no issues with the pumps they currently sell. My oil pressure previously was pretty good but the pump is at least 25 yrs old and might even be back to 1993 when the car was last restored. Any advice from you Sages of Great Wisdom out there? Many thanks in advance! MARK
-
I am replacing the camshaft on my 73 CR TR6 and I am re - pinning the larger cog on the Distributor / oil pump drive. Is there a correct orientation for this to be fitted and also fitting distributor to this drive. I don't have a metering unit fitted at moment as currently on triple Weber carbs. I am concerned that if fitted incorrectly the distributor could be 180 deg. out. or cause problems with rec counter drive fouling. MARK
-
I have a spare cylinder head which is fitted with single valve springs. I wish to fit this to my TR6 1973 uk car but with double valve spring configuration. I asked a well known supplier to send me what I would need but I'm not sure that I have been sent correct parts. The diagrams of workshop manuals are vague. The Brown book states that ' Later PI cars the valve collar arrangement on both inlet and exhaust valves is as diagram A' - which shows a one part upper valve collar. However double valve configuration is not shown. The diagram shows a valve spring seat with a raised centre part. I have been supplied with 12 valve spring spacers part number 149717 which will only space the inner spring from the head. This would leave the the outer spring sitting directly on the head is this correct? The inner spring spacers 149917 may be a replacement for the original lower spacer. The valve Spring set I have been supplied is red marked, part no.CVS6686K TR5/TR6 Double valve Spring set. I would very much welcome information as to the correct configuration of valve seats for CR and the correct part numbers. Thanks in advance to the Sages out there! As my mate John Morrison promotes, this Forum is a great tool ! MARK
-
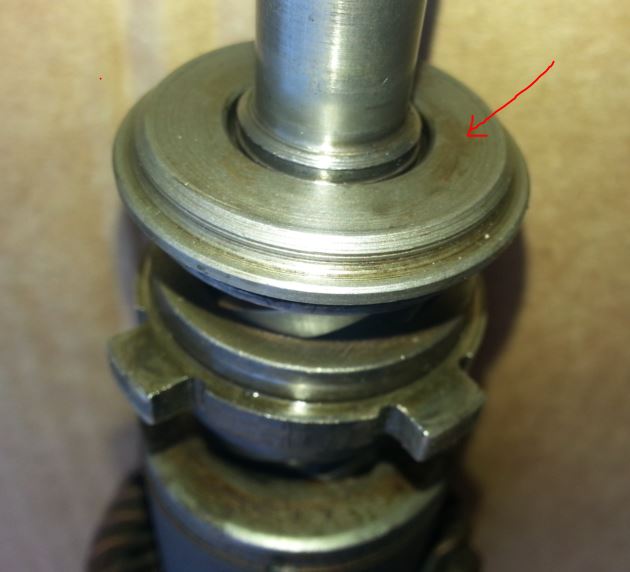
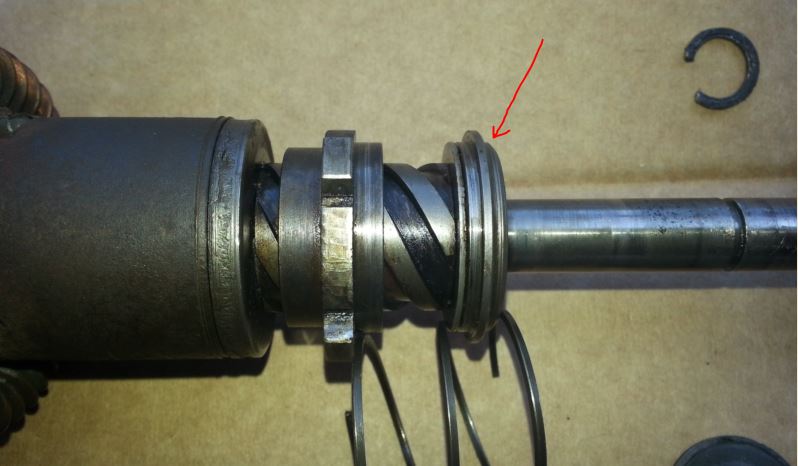
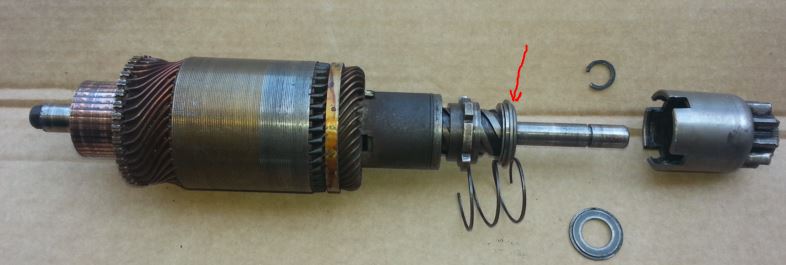
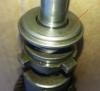
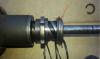
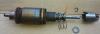
Good afternoon! I'm trying to dismantle my Lucas "bomb" type starter motor M4185 V164. The motor turns fine and pushes the bendix out but fails to turn the engine. I think that the coupling, (sleeve and rubber drive item#57 in the Moss catalogue) must have delaminated and I need to replace it. I've never seen a starter like this before and I can't dismantle it. I've removed the bendix gear OK but I can't get any further. My "Autobooks" manual refers to a pin and at nut that I don't seem to have. I've attached some pictures with where I've got to. I cannot find how to remove the collar (arrowed). I wonder if it has a circlip inside the collar but I can't actually see one nor see how to get at it if it is there! Once dismantled I'd appreciate any tips on the rebuild please. Any suggestions most welcome. Many thanks Regards Andrew King Swanage TR3a TS75982L
-
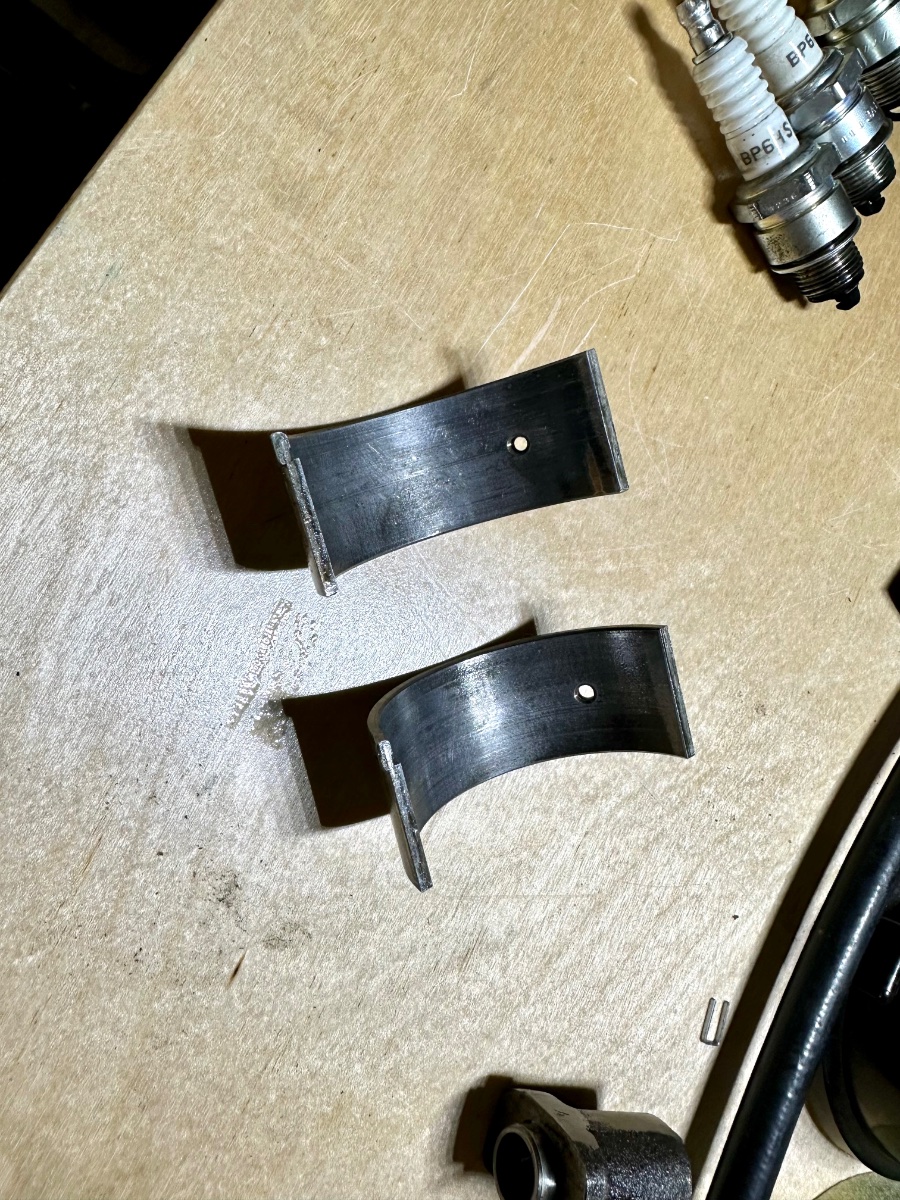
 Hi All, I am trying to track down a knocking noise that is mostly evident when the rev are low and reducing (on over run(?)). Using my stethoscope, it sounds like the knocking is coming from the back of the engine block closer to the crankshaft then the cylinder head. I checked all the obvious stuff and now am onto the big end bearings. I have pulled the piston 4 big end bearing just to have a look and it doesn’t appear that bad. There also doesn’t appear to be any issues with the crankshaft, so I highly doubt this is what’s causing the knocking sound. my question is, from the picture, would you advice while I’m here to go ahead and change all the big end bearings or just put this one back in and revisit in 10,000 miles? Thank you, Adam
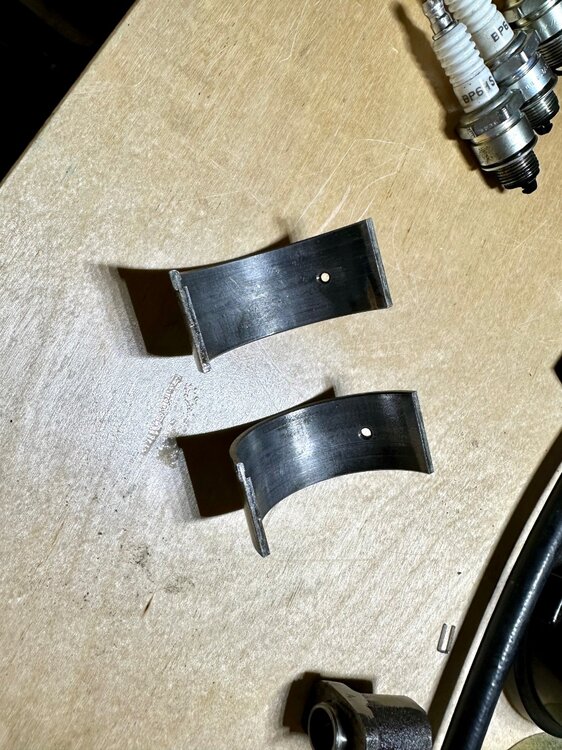
-
Gents Good evening The cold months are with us and the time for some routine maintenance (otherwise known as quality time) has arrived My question is this; Given that my car has modern bottom end shells, modern, little end bearings, 2002 camshaft, pistons and rings & replacement oil pump amongst other things (in fact, rebuilds and replacement parts mean that the head and block are probably the only original or pre 1998 components left of the 1975 engine that rolled out of the factory), which engine oil should I use? Do I stick with the specialist Castrol / Penrite / Miller classic oils? Given that the engine parts are all of modern manufacture, can I utilise a modern multigrade mineral or synthetic oil? Thanks in advance John
-
Hi All, A problem I’ve been trying to diagnose for a while. Weirdly, plug number two is showing all the signs of overheating - the electrodes appear white, with no brown or black colouration. I have checked the ignition - swapped over the coil, new plugs, I have run it on points and with Luminition optotronic ignition and the advance seems to be a few degrees BTDC. I have done a compression test and all cylinders are showing 150 psi after a few turns of the engine. And the valve clearances look good at 10 thou. I doubt it’s a fuelling issue as plug number one is running rich, and this points to ignition, however I’m struggling to think what’s left to check. However, it could be that the problem is actually with cylinder 1, and the fouling of the plug is coming from something other then the two much fuel, and running lean on plug 2 would cause overheating. Is it now worth taking the cylinder head off and checking the state of the valves and to see if the waterways around cylinder two are clogged? At the next opportunity, I might check to make sure the valve lift is consistent. Weirdly, I have noticed a potential new knocking noise coming from the engine, but this might be me tuning into random noises, as the sound softens once the engine is warm. I worry, I am just looking for issues now. Thanks in advance, Adam

-
HI All, looking for some advice. I've noticed that the core plug at the back of the cylinder head on my TR4 is weeping slightly and I need to change it. Looking at the usual suspects sites I can see that there are two types of 1 5/8" core plug, a cupped and a dished version. Dished currently in place. Is there any recommendations as to which is the best to use, or does it depend on the head and if there is a shoulder or not in the hole. Also I used a locktight formula to seal the plugs in place, many years ago, is there anything currently recommended to use to seal the core plug? I'm also assuming I can replace it with the head still in place by removing the battery, is this practical? Mark
-
Hello, Looks like I got a significant oil leak in the area close to the spark plugs (engine tr4a). After cleaning, adding some white powder it is clear that the oil comes from the pushrod tubes. From all of them, but looks like a bit more on cylinder 4. Complete engine restoration was done 15 years ago and car has run less then 15 thousand miles since then. I guess it is about time to show some deterioration. Looks like the remedy being head removal and proper reassembly of the tubes in a new gasket (drawing attached). I have a 694-510 head gasket from Mossmotors US and there is a note for new tubes: "swag ends in head and seal with blue locktite" which is not quite clear to me. Also , the same 694-510 head gasket is for 83, 86 and 87 mm cylinders (?). Moss Europe has different gaskets for different cylinders dimensions. I also read somewhere in this forum a palliative solution of using locktite externally without removing the head. Any tip or recommendation? Any help will be appreciated. Regards, Reinaldo Morilha TR4A 1966 TR3A 1959
-
Dear All, Can anyone help me to understand the procedures and modifications necessary for upgrading the TR250 engine to TR5 spec or slightly above that level of performance? Is this easily attainable or am I better off sourcing a different engine? Thank you for your wisdom. Dave.
-
My oil pressure now is way over 100psi on the gauge. Even after driving 15 to 20 minutes, under acceleration. After being warmed up (driving 45 minutes) I'm still at 60 idle, and 90 under acceleration. I did fit a stainless braided oil line from the engine to the gauge, but afterwards, I had the same oil pressures that I had before, which was about 80 psi when cold under acceleration, and 25 psi at idle when hot. The only thing I did recently, was change the oil, with Valvoline Racing oil 20w50, and a different oil filter that I was using before. This one was a NAPA Gold. The oil was the same. I had been using the Fram PH3614. I read that that filter is not that good for trapping particulate matter, so I tried the NAPA filter that had good reviews. I thought that the NAPA filter was more restrictive, which I think it is, but when I looked at the oil flow diagram for the TR6 engine, I see that the oil pressure line is taken AFTER the filter, in the oil gallery line. Am I correct? So, If I have high oil pressure there, it's after the filter. So what prevents high oil pressure? The oil pressure relief valve- I took it apart, and saw nothing out of the ordinary. Where do I go from here? I ordered a new oil pressure relief piston and spring. Not sure that will do it, as it was fine before the oil and filter change. Any ideas? Cheers, George.
-
I have a spare late TR6 cylinder head. Fitted to the head when I bought it was a set of single valve springs which looked pretty new and have a red paint mark on the springs at half way. Anyone any idea what springs they are ? MARK
-
Hello, I will have to share this with someone as my wife is not interested, 23 months into my 3 month project and I finally, after a few false starts, had the car on the rolling road, 89mm pistons, Burgess cylinder head, Newman Cam, 10:1 CR, fuel injection and ECU, 102 HP at the wheels, what a difference, free revving, nippier and a lovely sound from the Phoenix exhaust. Now to solve all the electrical gremlins!! Cheers, Andrew
-
Hello Again, tale of woe continues, rebuilt engine, new pistons, liners etc, still a bit smoky after 300 miles so checked the compression, 1 &2 cylinders 150 psi, 3 & 4 cylinders 95 psi. Now the only linked part that i can think of is the head gasket, it is a composite one supplied by one of the better suppliers ( as recommended by many on here). Before I pull the head (rebuilt by P Burgess) am I on the right track? Once again, thanks, Andrew PS A bit more info, I have not retorqued the head yet, 89mm pistons, CR 10:1
-
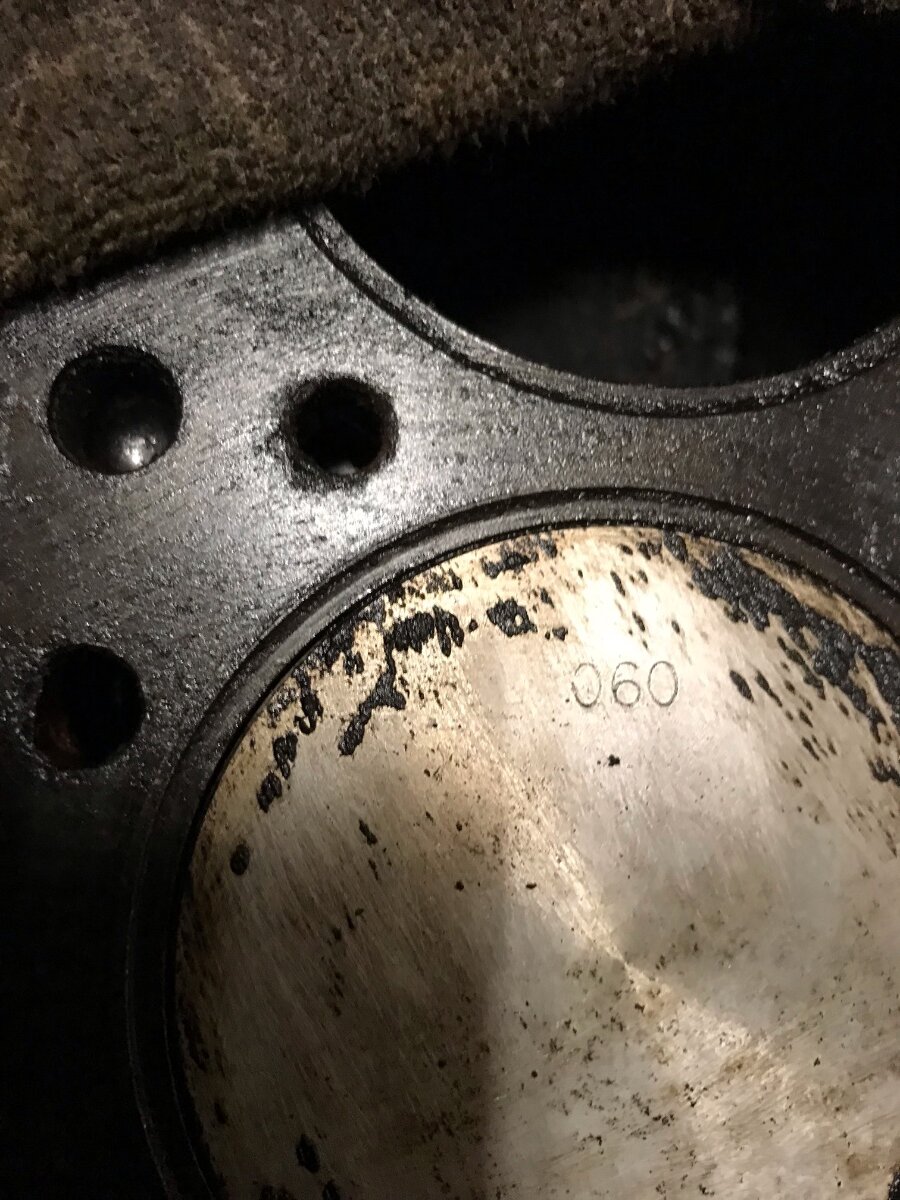
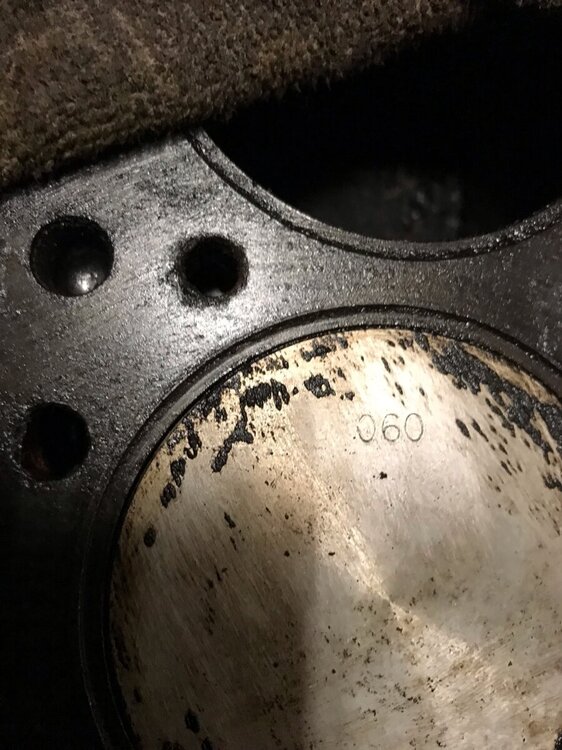
Hi all, Now facing an engine strip and rebuild following failure of cam followers and probably camshaft too. Anyway on removing head I notice that pistons are marked with ‘.060’ - suggesting 60 thou oversize pistons, but I notice too that the bores appear to have had liners fitted. I’m puzzled! Brown Book says that max rebore oversize should only be +.020”, and although it does mention liners, they are supposedly to be used to bring bores back to standard size, and I’m struggling to understand how I may have liners which are then bored .060” oversize which I would have thought would have left the liner walls very thin. The following pic refers. Can anyone shed any light on whether or not these are liners or maybe just recessed bores??, and and comments on the .060 piston marking appreciated. Thanks, TonyC :-
-
Hello, now 16 months into my 3 month project and the latest drama, torqueing down the head after checking, re-checking and checking TDC again, the r/h second from the front stud 'slipped' as I approached 105 ft/lbs, and as the thread on the stud is a little shiny, otherwise undamaged, it can only mean one thing, the threads at the bottom of the stud hole are b*ggered. I found 2 threads on here with information, however, for me, the important one wasn't answered. My plan is as follows, bearing in mind the stud hole is 140mm deep. Firstly obtain a long 1/2" unc bolt, groove the thread end and see if I can clean up what threads are left, clean out the hole and try to fit the head again, if I struggle to 'clean' the threads with the bolt use the second hand 1/2" unc tap on its way from ebay. I can fit a 1/4" drive 9mm socket down the hole and if I can securely attach the socket by butchering the end of the tap I can then run that down the thread, if either of these work have another go at fitting the head. If that doesn't work it Helicoil gets the thumbs up in the previous threads, and as it is unlikely the drill bit supplied will reach the bottom of the hole is there any reason I can't fit the helicoil to the top of the hole, and fit two coils as per Rogers earlier post using a modified stud, alternatively fit the coil to the extent of the drill bit, and again, modify the stud to suit. So the question is, is there a difference in the clamping force from a stud at the top of the block or one buried in the body of the block?, As always, grateful thanks for any response, cheers, Andrew
-
Morning Gents i have to say I’ve been honoured recently to have been contacted by Santa. He asked me to request this forum group to see if anyone may have a complete Phoenix exhaust system that they would be prepared to part with, if you have could you please forward info and I will forward to my new friend who can then make another individual very happy. Al
-
 I have just purchased stainless steel radiator return pipe with boss and thermostatic fan switch for my 73 uk TR6, part no.158417ss. However this new one is quite a different bended shape than my old one and the upper end does not seem to align correctly with the water pump housing connection. Fitting it would seem to bend the 90 deg. hose to quite a bit less than 90 deg. My old stainless one was not the best made but at least fitted but will need a repair. Were there different water pump housings and radiators that would explain my problem? Has anyone encountered this before? MARK
 -
Bob (who has worked with me for many years) has a fully rebuilt TR6 (PI) engine for sale.... Anyone that knows him will realise that he builds a superb engine and has been doing so for many many years professionally...... The engine has been totally stripped and is in the process of being built back up as we speak. The Short Back Crank has been machined / balanced and re-ground and will be fitted with new shells etc. It is worth noting a long back crank is also available if required. At this stage you can specify camshaft etc....The pistons etc are new and have all been balanced. The block hasn't been bored out so is standard size and in perfect nick. The head has been converted to unleaded specification and the number on the head denotes TR5 / Early TR6 PI Bob's rebuilt engine's are ultra smooth and powerful, probably around 180 bhp mated to a phoenix exhaust and manifold.... The price depends on the final spec / build to if interested please give him a call direct on 07733 962309 Cheers Mark - Classic Marks
-
Later PI CP TR6 models were, I believe fitted with single valve springs. CR models were fitted with double springs.( Info from Repair Operation Manual). I have a spare CR head but has single valve springs which I don't know is original fitting ??( Overlap between models from leftovers in the parts bin ?) . I have a 73 CR TR6 on Triple 40 DCOE Webers with a 285 cam. Anyone have an idea what would best twin or single valve springs for me ?. Jaguar AJ 6 valve springs for a TR6 have also been discussed in the past. Do these require the inner springs ? MARK
-
Hi my handsome friends An old chestnut i no, my apoligies, I am running webers, wild cam ligtened fly wheel, (fast road engine) Car runs well over 2, 000 rpm, in traffic below 2000rpm the plugs start to foul up, resulting in banging missing etc, they clear when I get going, Dificult on the iow short journeys, I use the gear box to keep the revs up to prevent fouling, is there a plug that would help with this I am running ngk 7 presently thank you Pink
-
Hello, still bolting the engine bits back together and the next hurdle is the camshaft, with the camshaft fitted (new), bearing in place and cam sprocket bolted on there appears to be no endfloat, in fact the cam sprocket is tight up against the front cam bearing and it won't turn, I have searched on here and read both manuals and information is scarce. Looking at the setup I think I have to remove a few thou off the rear of the cam bearing to get my end float, the front can't be changed as the cam sprocket is hard up against the bearing, am I right?, as always, thanks, Andrew